Convenient Function
Discover your music listening style
-
1-1. Add to the shortcuts list You can save your favourite folder, station or music for quick and easy access.
Tap the icon to register.
Browse the target sound source (see Note).


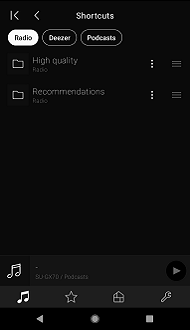
1-2. Call ShortcutsYou can quickly and easily call your favourite folder, station or music registered to the shortcuts list.
Tap button on the 「SOURCE」
 screen.
Sound sources are filtered and listed.
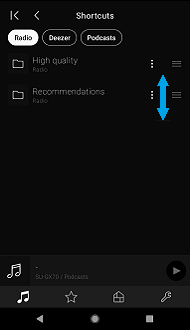
 1-3. Sort the shortcuts listYou can sort the list by dragging the grip
 on the right side of the list up and down.
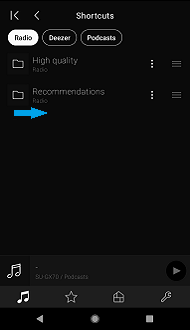
 1-4. Delete shortcuts listYou can delete the list by swiping from the left side to the right side of the list you want to delete.
-
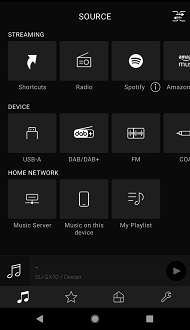
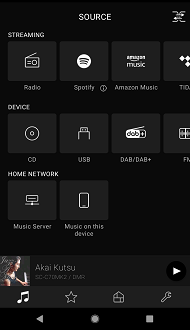
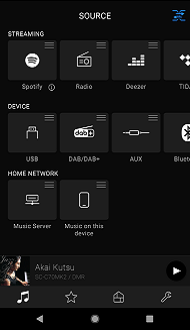
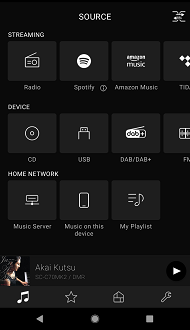
You can sort the music source icons according to the categories of "STREAMING", "DEVICE", and "HOME NETWORK".Tap the upper right button
 on the 「SOURCE」 screen.
A grip is displayed in the upper right of the music source icon.
Touch and hold the music source icon you want to move, drag left or right, and tap
on the 「SOURCE」 screen.
A grip is displayed in the upper right of the music source icon.
Touch and hold the music source icon you want to move, drag left or right, and tap  .
.
-
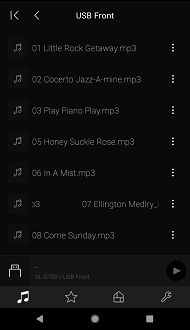
1-1. Add to USB playlist ※This function is supported by SL-G700M2 / SL-G700 / SU-GX70 / SA-C600 / SA-C100 / SC-C70MK2 / SC-C65.
The latest firmware (Ver.1.00.04.00 or later) is required to use with SL-G700.
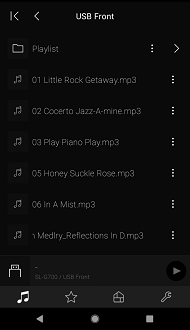
You can add your favourite songs in USB to the playlist and play them.
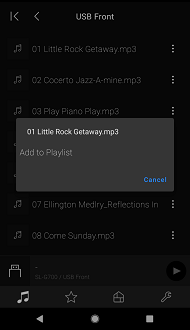
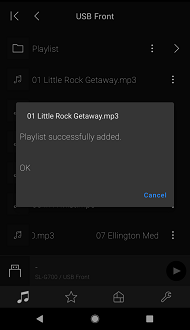
Add a song to the USB playlist from the menu icon next to the song title.
※A "Playlist" folder is created in the TOP of USB memory.
Note:- You can add up to 1000 tracks to playlist.
- Click here for USB Playlist FAQ Click here for USB Playlist FAQ
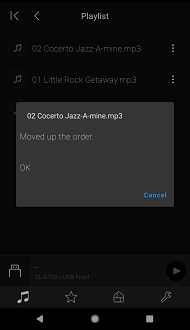
1-2. Rearrange USB playlist Please stop the song being played.
In the Playlist folder, sort the songs from the menu icon next to the song title.
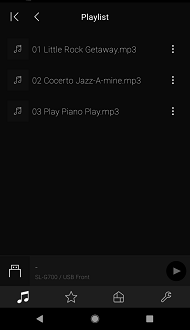
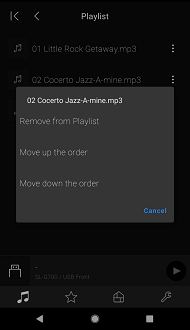
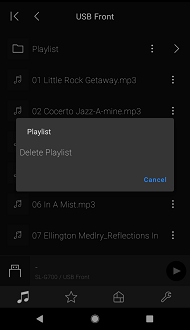
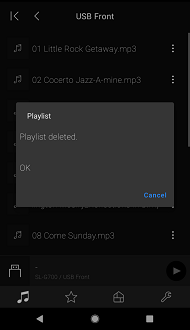
 1-3. Delete USB playlist (folders / songs) Delete it from the Playlist folder or the menu icon next to the song title.
- You can add up to 1000 tracks to playlist.
-
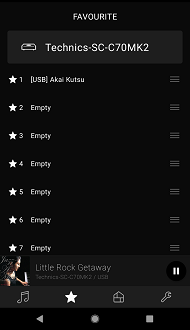
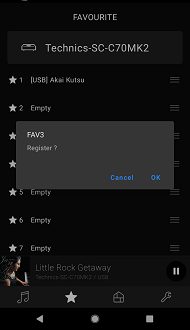
1-1. Add the FAVOURITE listMethod 1 (FAVOURITE)
Press and hold any FAVOURITE number while playing the target sound source (* see Note).
 Method 2 (Now Playing)
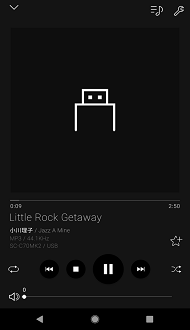
Open the [Now Playing] screen while playing the target sound source (* see Note).
Tap the icon, then tap any FAVOURITE number.
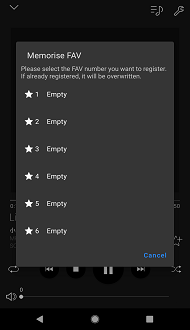
Note:- It is also possible to overwrite FAVOURITES list by press and hold any number on FAVOURITE screen.
- Click here for FAQ about FAVOURITE Click here for FAQ about FAVOURITE
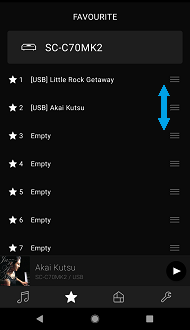
1-2. Sorting the FAVOURITE listYou can sort the list by dragging the grip on the right side of the list up and down.
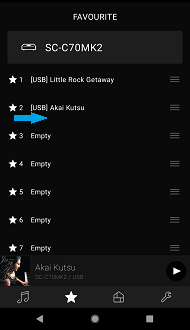
 1-3. Delete FAVOURITE listYou can delete the list by swiping from the left side to the right side of the list you want to delete.
-
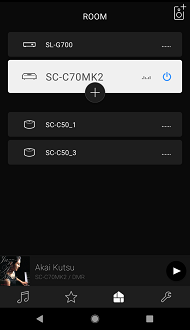
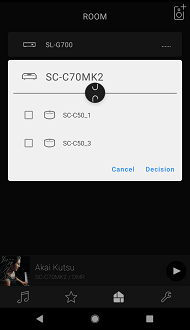
1-1. Multi-room (Group)Tap the group button
 .
.
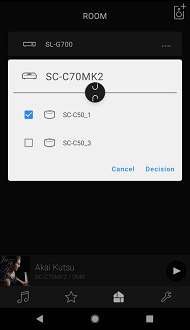
Tap the speaker you want to group followed by [Decision] to group them.
Note:-
Two or more compatible speakers (SL-G700M2 / SA-C600 / SA-C100 / SC-C70MK2 / SC-C65 or SC-C50 / SC-C30) are required to use this function.
- Click here for FAQ about ROOM Click here for FAQ about ROOM
1-2. Unmulti-room Tap the group button .
.
Tap the speaker whose group you want to ungroup followed by [Decision] to cancel grouping.
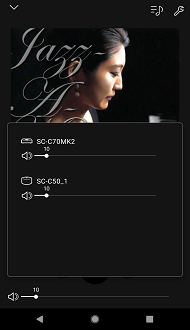
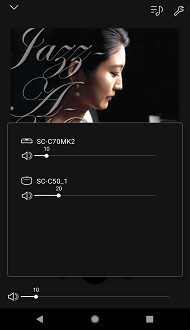
 1-3. Change multi-room volume You can change the volume of grouped speakers at once or individually.
Volume control in the grouped state is the volume control for the entire group.

A popup windows is displayed when you control the volume during multi-room.
Popup window description:
1st row speaker: Volume control for the entire group speakers
2nd row speaker onwards: Volume control for individual speaker
-
Two or more compatible speakers (SL-G700M2 / SA-C600 / SA-C100 / SC-C70MK2 / SC-C65 or SC-C50 / SC-C30) are required to use this function.
-
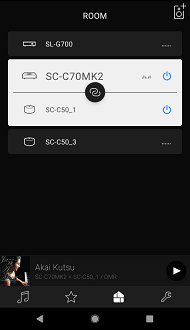
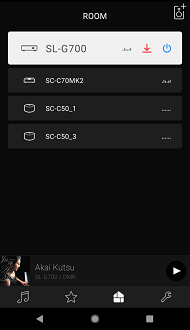
You can turn the speaker power on and off by tapping the power button
 at the right of the speaker name.
※When the Network Standby (SL-G700, SC-C50, SC-C30) / Standby Mode (SL-G700M2, SU-GX70, SA-C600, SA-C100, SC-C70MK2, SC-C65) setting is Off, the device whose power is turned off cannot be started from the app.
Note:- If you operate the power button in the stereo pair state, the power control will also be linked to the other side.
-
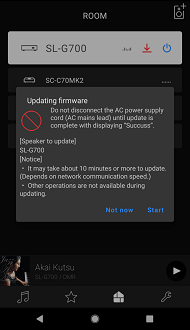
When there is firmware update information, the update button
 is displayed.
Tap the update button and follow the instructions on the screen to update the firmware.
-
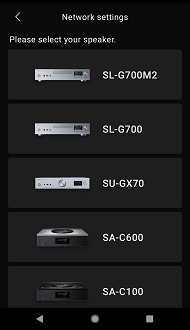
You can configure the network settings for the new speaker.
Tap the Add Speaker button on the upper right of the screen.
After select the model to add, follow the on-screen instructions to configure the network settings.
-
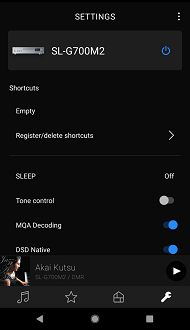
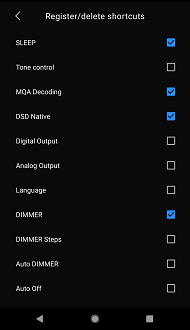
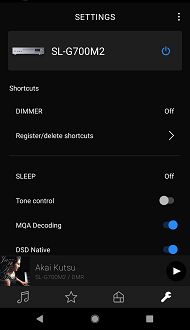
1-1. Register shortcut Customization of frequently used items for quick and easy access at top of SETTINGS page.
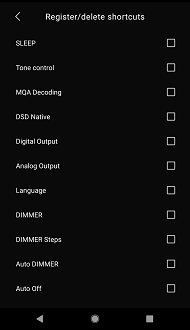
Method 1 (Select from list)
Tap Register/delete Shortcut to register the checked items.
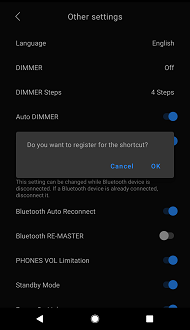
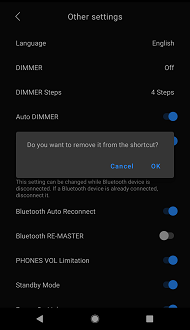
 Method 2 (Long press on item)
Press and hold the item you want to register as a shortcut.
Example: When registering DIMMER as a shortcut
1. Open Other settings
2. Press and hold DIMMER
3. Tap OK

Note:-
Only items that can be registered are displayed in the shortcut list.
-
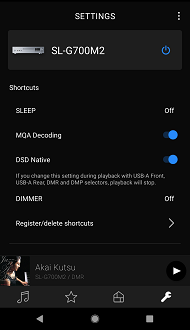
Add to the shortcut column in the order of registration.
- Click here for FAQ about SETTINGS Click here for FAQ about SETTINGS
1-2. Delete ShortcutMethod 1 (Select from list)
Tap Register/delete Shortcut and uncheck the item you want to delete to delete it.
 Method 2 (long press on item)
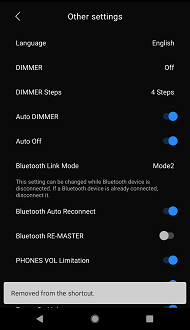
Press and hold the item you want to delete from the shortcuts and delete it.
Example:To remove DIMMER from shortcuts
1. Open other settings
2. Press and hold DIMMER
3. Tap OK
-
Only items that can be registered are displayed in the shortcut list.
-
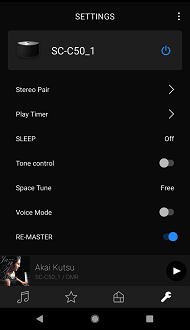
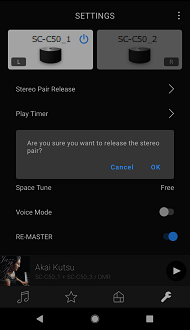
1-1. Creating a stereo pair※This function is supported by SC-C50 / SC-C30.
You can create a stereo pair from the 「SETTINGS」 screen when two same speakers are on the same network.
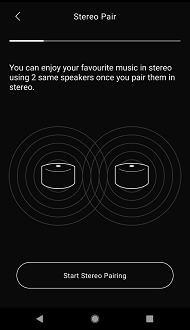
Tap [Stereo Pair] and follow the on-screen instructions to set the stereo pair.
Note:-
When using Stereo Pair function, two SC-C50s or two SC-C30s are required. Update each speaker to the latest version (Ver.1.01.00.00 or later).
-
Before creating a stereo pair, please stop playback. If a stereo pair is created during playback, playback will automatically stop.
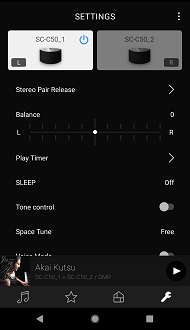
1-2. Balance functionYou can adjust volume balance when using Stereo Pair function.
Note:-
When using Balance function, two SC-C50s or two SC-C30s are required.
Update each speaker to the latest version (Ver.1.01.06.00 or later).
- Click here for FAQ about SETTINGS Click here for FAQ about SETTINGS
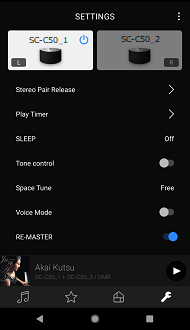
1-3. Stereo pair cancellationFrom the 「SETTINGS」 screen, tap [Stereo Pair Release] and then tap [OK] on the screen that appears.
-
When using Stereo Pair function, two SC-C50s or two SC-C30s are required. Update each speaker to the latest version (Ver.1.01.00.00 or later).
-
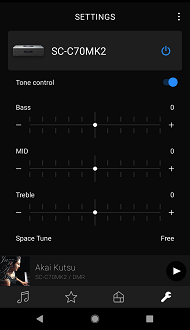
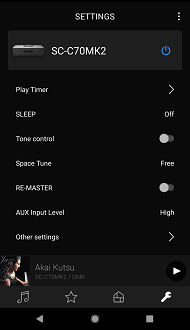
Tone ControlUse the Tone Control for more advanced settings of sound quality.
Select "On" for Tone Control, and adjust Bass/Middle/Treble.
Note:-
You can adjust the Tone Control when used with the following combination of Technics products.
-
Combination of SL-G700 or SL-G700M2 and integrated amplifier* , SU-GX70 / SA-C600 / SA-C100 / SC-C70MK2 / SC-C65 / SC-C50 / SC-30
* SU-C700, SU-G700, SU-R1000, SU-G700M2 -
In parallel, Space Tune setting items are depending on which model you are operating.
-
Make sure the device is turned on before making adjustments.
-
Combination of SL-G700 or SL-G700M2 and integrated amplifier* , SU-GX70 / SA-C600 / SA-C100 / SC-C70MK2 / SC-C65 / SC-C50 / SC-30
-
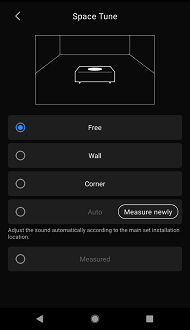
Space Tune・Free : No objects(wall,etc.) around speaker(Initial value is here.)
・Wall : Wall : There is a wall behind speaker.
・Corner : Speaker is in the corner of the room.
・In a Shelf : There are speakers in the shelf.
・L/R Custom : Sets the sound quality for each speaker.
・Auto : Adjust the sound quality automatically according to the installation location by speaker.
・Measured : After measuring with iOS device, you can measure the location between your iOS device and speaker.
 Note:
Note:- This function is supported by SU-GX70 / SA-C600 / SA-C100 / SC-C70MK2 / SC-C65 / SC-C50 / SC-C30.
- Click here for FAQ about SETTINGS Click here for FAQ about SETTINGS
-
DSD Native※This function is supported by SL-G700/SL-G700M2.
The firmware (Ver.1.01.00.00 or later) is required to use with SL-G700.
Enabling the native playback for DSD signal from the USB device or network device.
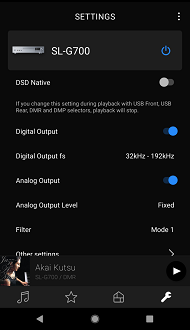
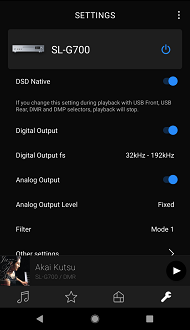
Note:- Refer to trouble shooting in FAQ when the content is not played back properly.
-
1-1. Add QueueSelect your song by the following steps.
1-1. When you select [Music Server] or [Music on this device], some folders such as artist and album are displayed. Select your preferred artist or album, and go to the song selection screen.
1-2. When you select [My Playlist], some playlists you created previously are displayed. Tap your preferred playlist, and go to the song selection screen.
※[My playlist] must be created in advance.
2. On the song selection screen, tap the songs name to start playing.

You can also tap the menu icon to reserve a song.
※Playback will start at the first selection (song tap). All songs in the folder are registered and played.
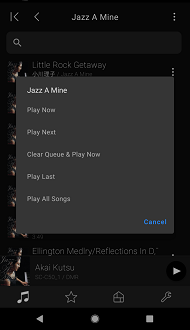
1. Tap the menu icon to the right of the album (folder) name or song name you want to reserve.
2. Tap one of the displayed menus to make a reservation.
The functions of this menu are as follows.
- [Play Now] : Register the selected song next to the song is being selected in the Queue. Then, start to playback from registered song.
- [Play Next] : Register the selected song next to the song is being selected in the Queue.
- [Clear Queue & Play Now] : Replace all songs of Queue and register the selected song. Then, start to playback from registered song.
- [Play Last] : Register the selected song in the last of Queue.
- [Play All Songs] : Register all songs including the selected song next to the song is being selected in the Queue. Then, start to playback from registered song.
Note:- After creating the My Playlists, if the storage location (folder or IP address of your server, file name, etc.) of your songs are changed or the songs were removed, you will not be able to playback. In these case, try again to create a new My Playlist or edit the created My Playlist.
-
Only DMR songs can be added to the selection list.
Other selectors (TIDAL, Deezer, etc.) cannot be added to the selection list.
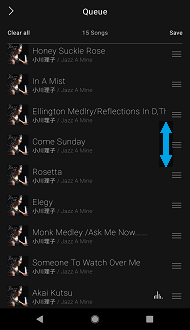
1-2. Sort QueueTap on the 「Now Playing」 screen to display the 「Queue」 screen
On the 「Queue」 screen, drag the grip on the right side of the song you want to rearrange up or down to change the playback order.
on the 「Now Playing」 screen to display the 「Queue」 screen
On the 「Queue」 screen, drag the grip on the right side of the song you want to rearrange up or down to change the playback order.

 1-3. Delete QueueTap on the 「Now Playing」 screen to display the 「Queue」 screen
On the 「Queue」 screen, swipe the song you want to delete to the right.
1-3. Delete QueueTap on the 「Now Playing」 screen to display the 「Queue」 screen
On the 「Queue」 screen, swipe the song you want to delete to the right.
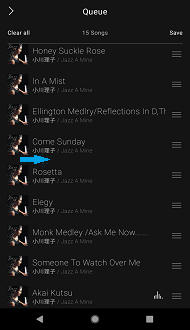
If you want to delete all the songs on the 「Queue」 screen, tap [Clear all] → [OK].
Note:- You can delete the song being played. After deletion, the device will be in a stopped state.
-
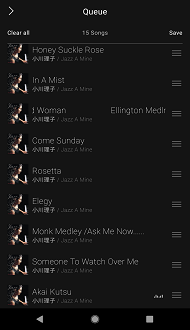
1-1. Create My PlaylistMy playlist is created on the 「Queue」 screen.
1. Tap on the 「Now Playing」 screen
2. Tap [Save] at the top right of the 「Queue」 screen
3. Enter the name of my playlist and tap [OK]
※ You can select the created My Playlist from [My Playlist] on the 「SOURCE」 screen.
Note:- The created My Playlist can be used only on the created Android™ device.
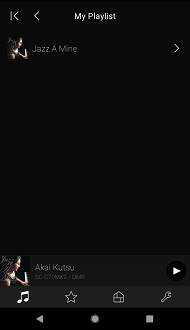
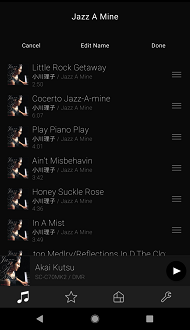
1-2. Edit My PlaylistFollow the steps below to edit My Playlist from the 「SOURCE」 screen.
1. From [My Playlist], tap the name of the My Playlist you want to edit
2. Tap [Edit] to display the My Playlist edit screen
The My Playlist edit screen has the following three functions.
・1 song deleted
・Change song order
・Edit my playlist name
3. Finally, tap [Done] to save your edits.
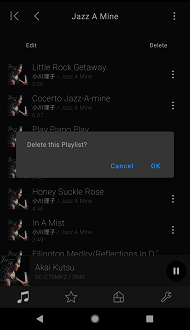
 1-3. Delete My PlaylistFollow the steps below to delete My Playlist from the 「SOURCE」 screen.
1. Tap the name of the My Playlist you want to delete from [My Playlist]
2. Tap [Delete] → [OK]